Innovative Interior Wall Service Cavities That Allow Future Electrical Upgrades Without Repeated Demolition
Every homeowner who has ever wanted one more outlet, a wall-mounted television, or an electric vehicle charger in the garage has met the same obstacle: the wires live inside finished walls, and the only way to reach them is to cut the wall open. An interior wall service cavity solves that problem at the framing stage. It is a slim, accessible channel built into a partition wall that lets an electrician pull new cables, add circuits, and reach junction boxes years later without breaking out drywall, patching, and repainting whole rooms.
Why Sealed Walls Turn Every Upgrade Into a Demolition Job
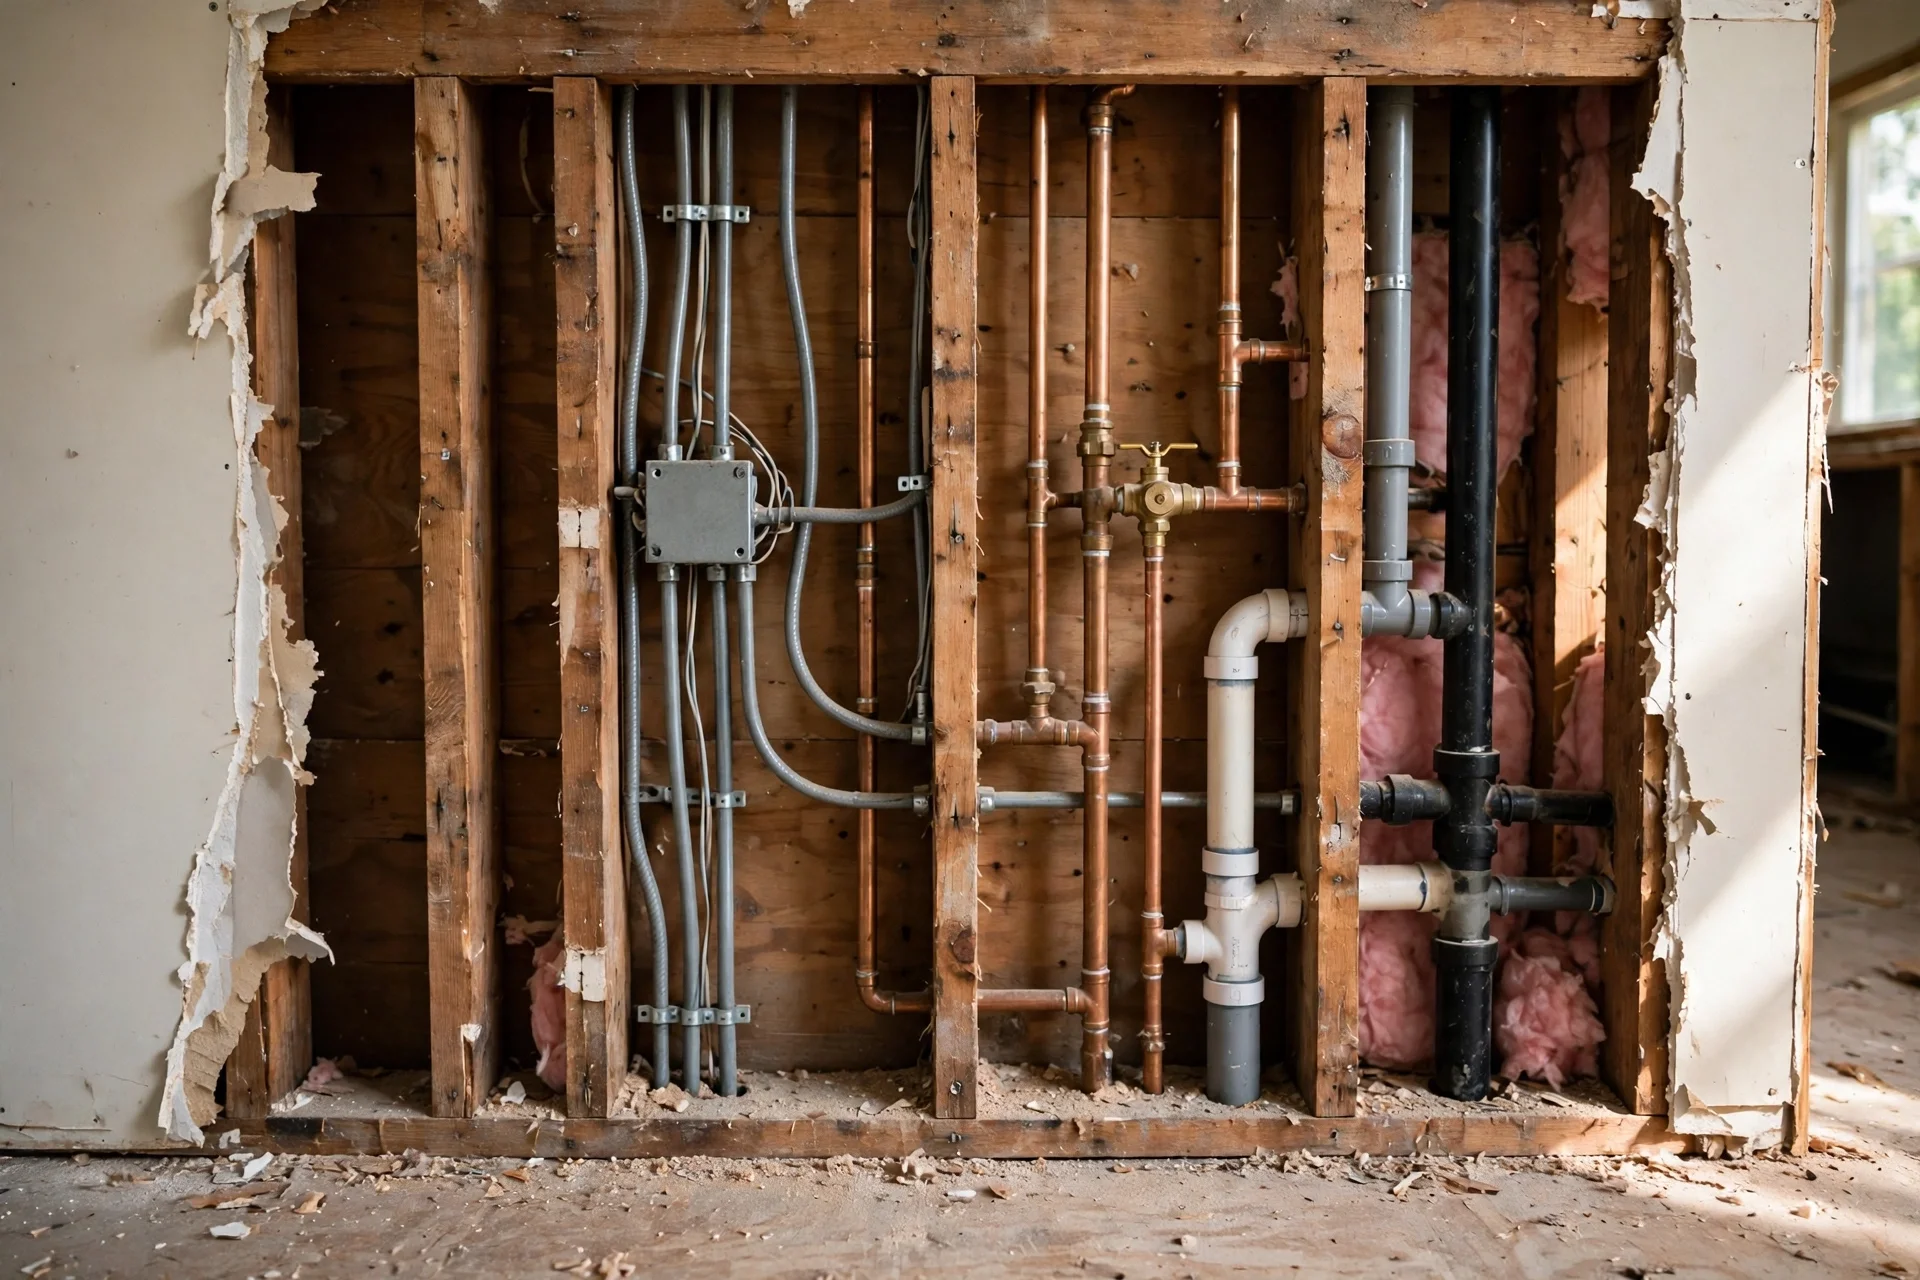
A conventional stud wall is a closed box. Once the drywall is up, taped, and painted, the cables inside are effectively entombed. Adding a circuit means cutting access holes, fishing cable blindly through insulation, and then paying for drywall repair, texture matching, and paint — work that often costs more than the electrical work itself. In older homes the damage is worse, because plaster and lath crumble when cut, and matching a decades-old finish is nearly impossible.
The frustration compounds over time. Homes accumulate new electrical demands every few years: a home office, a heat pump, a security system, a kitchen island outlet, a dedicated circuit for a treadmill. Each one becomes a small demolition project, and each repair leaves a faint scar in the finish. A service cavity breaks this cycle by giving the wiring a permanent, reachable home inside the wall, so the next upgrade is a fishing job through an open channel rather than a saw job through a finished surface.
What a Service Cavity Is — and What It Is Not
A service cavity is a continuous vertical or horizontal void inside a partition wall, kept clear of insulation and blocking, with removable access at logical points. Think of it as a narrow utility shaft hidden behind a removable panel or a section of trim. Cables run through it in conduit or as properly supported cable, junction boxes sit behind labelled access panels, and spare conduit waits empty for whatever the future brings.
It is not a chase for everything. Plumbing, ductwork, and gas lines do not belong in the same cavity as electrical cable unless local code explicitly allows the combination, and in most jurisdictions it does not. It is also not a substitute for proper circuit design: the panel still needs spare capacity, the circuits still need correct sizing, and every splice still needs to sit in an approved box. The cavity is an access strategy, not a shortcut around electrical code, and it works best when it is planned on paper before a single stud is cut.
Mapping Your Home’s Likely Upgrade Paths Before You Build
A service cavity earns its keep only if it runs where future work will actually happen. Before framing, walk the house with a floor plan and mark the places where electrical demand is most likely to grow: the wall behind the main television, the home office, the kitchen island, the garage wall nearest the driveway, and the bedroom wall where a future mini-split head might go. Those are the routes your cavity should serve.
- Television and media walls: run a cavity from the floor to the mounting height, with a spare conduit for HDMI, network, and future low-voltage lines.
- Home office walls: plan for extra receptacles, a dedicated circuit, and two network drops, since remote work keeps adding devices.
- Garage walls: leave a route for an EV charger circuit and a subpanel feed, even if neither is installed yet.
- Kitchen and island walls: island receptacles and under-cabinet lighting are far easier to add when a cavity reaches the floor.
- Exterior walls near the roofline: a route to the eaves serves future security cameras, landscape lighting, and holiday circuits.
Sketching these routes first also reveals where a cavity is not worth the effort. A short wall with no outlets and no future use does not need one, and neither does a wall that will be buried behind built-in cabinetry. Concentrate the cavities on the two or three walls in each home that will see the most change, and the investment stays small while the payoff stays large.
Three Cavity Layouts Compared: Chase, False Wall, and Surface Raceway
There are three practical ways to create a service cavity in a home, and the right choice depends on whether the wall is new, existing, or already finished. A framed chase is built into new construction; a false wall adds a shallow service zone in front of an existing wall; and a surface raceway is the least invasive option for finished rooms where opening the wall is out of the question.
| Layout | Best suited for | Depth taken from the room | Future access |
|---|---|---|---|
| Framed chase | New builds and full gut renovations | None — inside the stud depth | Excellent, via panels and conduit |
| False wall | Existing rooms losing little floor space | About 2 to 3 inches | Very good, behind removable panels |
| Surface raceway | Finished rooms, rentals, light loads | Under 1 inch on the wall face | Good for low-voltage, limited for power |
The framed chase is the gold standard because it costs nothing in floor space and disappears completely into the wall. The false wall is the pragmatic retrofit: it steals a couple of inches from the room but gives full access without demolition. The surface raceway is a visible compromise, best reserved for data and low-voltage runs where appearance matters less than avoiding drywall work altogether.
How to Frame a Service Cavity Into an Existing Partition Wall
Retrofitting a cavity into an existing partition wall is a weekend-scale carpentry job when the wall is opened once and done properly. The goal is a clear vertical channel from the basement or crawl space to the attic, with no blocking, no insulation, and no diagonal bracing crossing the path. Mark the route, open the drywall on one side only, and keep the opposite face intact so the room stays usable while you work.
- Open one side of the wall between two studs, floor to ceiling, and remove any fire blocking in that bay.
- Screw a pair of slim battens to the stud faces to create a defined channel, keeping cables off the back of the drywall.
- Install a 1-inch or larger empty conduit from the basement to the attic through the cavity for future pulls.
- Mount junction boxes on the battens with their covers facing the room, never buried behind the finish.
- Fit a removable access panel at each box and at the top and bottom of the run before closing the wall.
The single most common mistake is closing the wall before testing the pull. Always fish a pull string through the conduit and slide a test cable through the cavity before the drywall goes back. Discovering a blocked channel after finishing costs exactly the demolition the cavity was built to prevent, so the ten-minute test is the cheapest insurance in the whole project.
Access Panels and Junction Boxes: Keeping Every Splice Reachable
Electrical code in most jurisdictions requires junction boxes to remain accessible without removing any part of the building finish. In the United States, NEC Article 314.29 states the rule plainly: boxes must be installed so the wiring inside can be reached without demolishing the structure. A service cavity makes compliance easy, because every box sits behind a removable panel rather than behind sealed drywall.
- Use flush, paintable access panels that blend with the wall and open without tools or with a single screw.
- Label each panel with the circuit number it serves, so a future electrician finds the right box on the first try.
- Keep boxes at comfortable working height — between waist and shoulder level — rather than buried near the floor.
- Never splice inside the cavity without a box; every connection belongs in an approved enclosure with a cover.
Labels deserve more attention than they usually get. A panel marked with nothing is only slightly better than no panel at all, because the next person still has to open every cover to find the right splice. A printed circuit directory taped inside the main panel, cross-referenced to panel labels on the wall, turns a future upgrade from a treasure hunt into a ten-minute job.
Which Cables and Conduits Belong Inside the Cavity
Not every wire deserves a place in a service cavity. Power circuits, network cable, coaxial cable, and low-voltage control wiring all belong there, provided each is installed to code with proper support and separation. High-voltage service entrance conductors, on the other hand, stay in their own dedicated route, and anything carrying water or gas stays out entirely.
| Cable or conduit | Belongs in the cavity? | Notes for the installer |
|---|---|---|
| NM-B branch circuit cable | Yes | Support per code; keep clear of sharp edges |
| Empty 1-inch conduit | Yes — always | Leave a pull string inside for future use |
| Cat6 network cable | Yes | Keep at least 2 inches from power where possible |
| Coaxial and speaker wire | Yes | Route with low-voltage, away from power |
| Service entrance cable | No | Needs its own dedicated, code-compliant route |
| Plumbing or gas lines | No | Never share a cavity with electrical runs |
The empty conduit is the most valuable thing in the cavity, and it costs almost nothing to install while the wall is open. A single 1-inch conduit from the basement to the attic, with a pull string inside, is the difference between a thirty-minute cable pull and a full day of drywall work five years from now. Install two if the budget allows — one for power, one for data — and cap the unused ends until they are needed.
Sealing, Soundproofing, and Fire-Blocking the Cavity
An open channel inside a wall is also a path for air, sound, and fire, so a service cavity must be detailed like the rest of the wall assembly. Seal the top and bottom of the cavity with fire-blocking material where code requires it, and seal penetrations through plates with approved fire caulk. This keeps the cavity from becoming a chimney that carries smoke and flame between floors during a fire.
Sound is the other concern. A hollow cavity can transmit voices and television noise between rooms, so line the cavity sides with a strip of acoustic sealant at the panel edges and consider a layer of mineral wool on the cavity walls — but never pack insulation into the channel itself, because that defeats its purpose. The goal is a cavity that is quiet, sealed at its ends, and still wide open in the middle for cables to move freely.
Where a Service Cavity Pays for Itself — and Where It Does Not
The economics of a service cavity are straightforward in a home that will change. One avoided drywall repair typically costs more than building the cavity, and most homes need at least one electrical addition every few years. Media walls, offices, and garages are the clear winners, because those rooms gain new devices constantly and their walls are opened most often.
- Pays for itself quickly: media walls, home offices, garage EV charging routes, and kitchen islands.
- Worth it in new builds: the cost is a few extra studs and a conduit while framing is already under way.
- Marginal value: short partition walls with no outlets and no plausible future use.
- Skip it: walls that will be permanently hidden behind built-ins, and walls in homes slated for near-term sale.
There is also a resale angle worth weighing. A buyer who sees labelled access panels and a documented spare conduit understands immediately that the house was built to be updated, and that impression is worth more than the modest cost of the work. In a home you plan to keep for a decade or more, the cavity is less an expense than a standing invitation to improve the house without tearing it apart.
Service Cavity FAQs: Pulling New Circuits Without Demolition
Can I add a new circuit without opening the wall?
Yes, if a service cavity or an empty conduit already reaches the spot. An electrician can fish a new cable through the cavity from the basement or attic, mount a box behind an access panel, and finish the job without cutting drywall. Without a cavity, the same job usually needs at least one access hole, plus patching and paint.
Does a service cavity weaken the wall?
No, when it is framed correctly. The cavity sits between existing studs, and the studs themselves carry the load as before. Removing fire blocking from one bay is acceptable only if the cavity is fire-blocked at its top and bottom, so have the layout checked against local code before you start.
How wide should a service cavity be?
A single stud bay, about 14.5 inches between studs in standard framing, is usually enough. The channel needs room for a conduit, a couple of cables, and a junction box, and a full bay gives an electrician’s hands room to work. Narrower channels save nothing and make future pulls frustrating.
Are junction boxes allowed inside a service cavity?
Yes, and that is exactly what the cavity is for. Every splice must sit in an approved box with a cover, and the box must stay accessible behind a removable panel. Code in most regions, including NEC Article 314.29, forbids burying a junction box behind a finished surface, so the panel is not optional.
Will a service cavity pass a home inspection?
Yes, provided the work follows code. Inspectors generally welcome service cavities because they make wiring accessible and verifiable. Keep the panel directory accurate, leave spare conduit clearly capped, and make sure every box is reachable, and the cavity becomes a selling point rather than a question mark.
Final Thoughts: Build the Wall That Lets Your Wiring Grow
A home’s electrical needs never stop changing, but its walls do not have to be rebuilt every time a new device arrives. A service cavity is a small act of foresight — a clear channel, a spare conduit, and a few labelled panels — that pays for itself the first time an electrician pulls a new circuit without touching a saw. Plan the routes on the rooms that change most, build the cavity while the wall is open, and test every pull before you close it up. The next upgrade will take an afternoon instead of a week, and the wall will look exactly as it did before.